Feature flags implementation in Nest.js 😻
Edouard Lacourt10 min read

😵 The issue
As a web developer, you know that it’s important to be able to deploy new features to users quickly and efficiently. But how can you do this without disrupting your development process?
Let’s imagine that a web project uses two environments:
- A staging environment where tests are performed to ensure the viability of the product
- A production environment for all users of the product
In a continuous development approach, deploying the staging code on the production environment is a complicated problem. Indeed, no unfinished feature should be present on staging. We are then forced to choose between two very uncomfortable cases:
- slow down the development process because when we decide to merge in production no new feature can be started.
- slow down the deployment frequency by waiting for a moment when no feature is being developed.
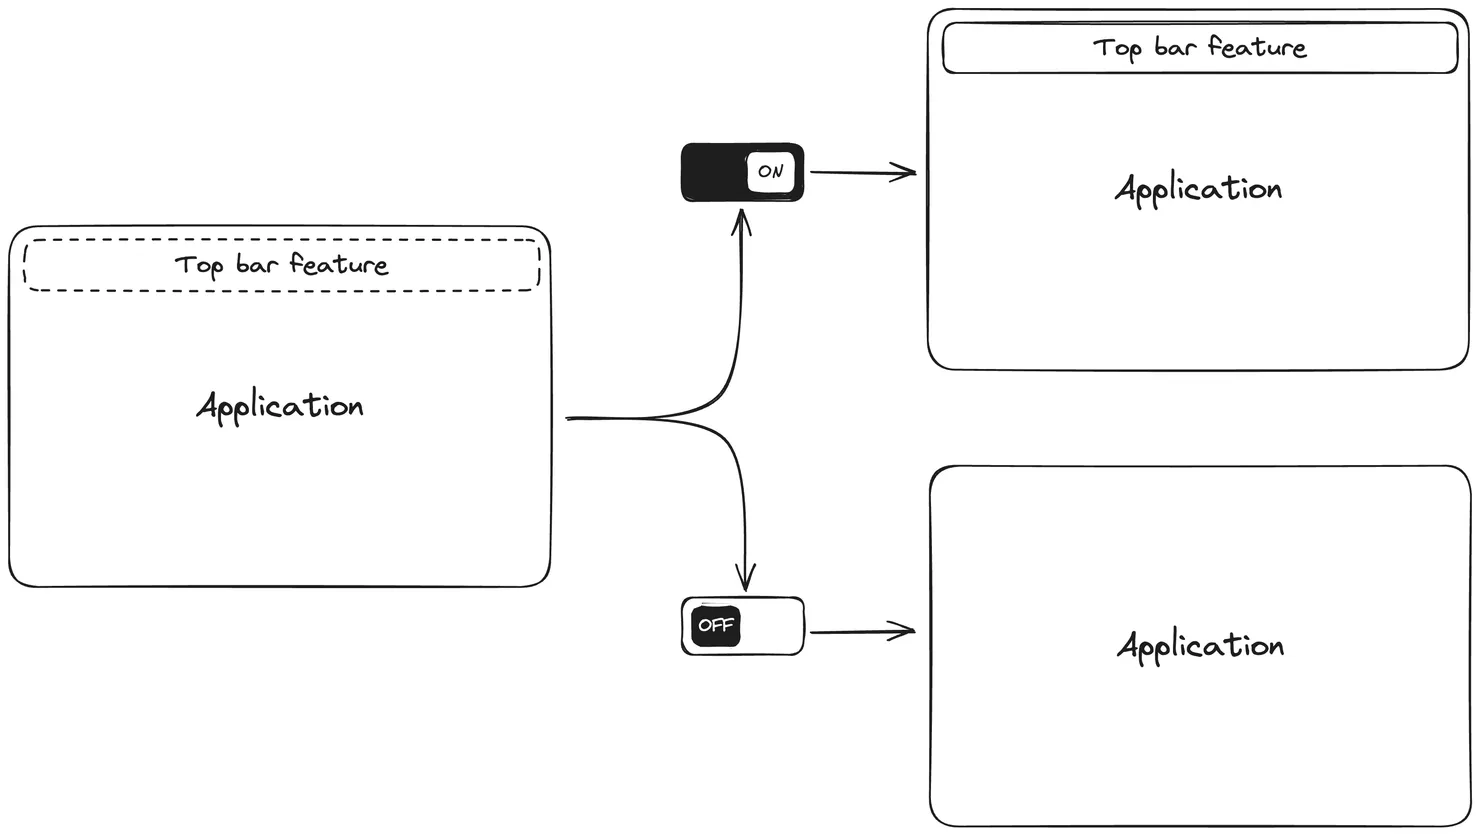
None of the above proposition is ideal. So we need a very simple way to decide conditionally if a part of the product is available or not to the users. Feature flaging is a very simple way to manage the features of an application.
🤔 What is Feature flaging?
The feature flaging or feature toggling is a practice that allows to manage very easily the availability or not of one or more parts of the code for a user. More concretely, a feature flag takes the form of a boolean variable that directly conditions certain parts of the code

🧐 Any other application?
Being able to quickly manage all the features of your application is a guarantee of quality. Beyond the comfort that feature flagging provides in the development and deployment of an application, it has many applications
- Don’t expose users to new bugs by cutting off access to the feature (canary) If a serious bug is found on a feature we are able to cut it very quickly. This avoids user frustration due to bugs, totally unusable features or worst security issues.
- Do A/B testing It is very easy to expose this or that feature to users. This is very useful to test two versions of the same feature and collect analytics to which one create the most engagement.
- Avoid feature branch. One solution to deal with unfinished features could be having a branch per feature and merge the branch once the feature is done. However the merge or rebase of the feature can be a pain. With feature flags you don’t need feature branches anymore.
🧑💻 How to implement?
🤓 The naive way
As we explained earlier, the feature flag is nothing more than a varible available anywhere in the code to condition it. So we could implement a feature flag as a local variable. We could imagine a configuration file listing all our features. As this file can be confidential, as it contains information about the structure of the project as well as its content, the environment variable file seems to be an ideal candidate to host our feature flags.
.env file example:
IS_TOP_BAR_FEATURE_ACTIVE=true
IS_MESSAGE_FEATURE_ACTIVE=false
IS_DASHBOARD_FEATURE_ACTIVE=true
This way we could decide to activate our features very easily and each environment or developer would have their own feature context.
This way of doing things is totally valid but has some limitations:
- In the long run, the management in an environment file can quickly become tedious and not clear. If we want to associate our feature flags with other parameters (for example a description or a version number for each feature), the environment variable file can quickly become hellish to manage.
- We can quickly get stuck in the case where a feature concerns several applications, for example our backend and our frontend.
- Having the features in a .env requires to re build all the project when we want to activate or deactivate a feature. This decreases the dev experience and imposes to have a down time of our application.
😽 Database can store feature flag
Of course the solution with .env files is easy to set up but it has its limits that databases can counter.
Storing the feature flag in a database allows the system to be flexible and accessible by several applications.
It will however be necessary to create a backend with a route to retrieve all feature flags. Once this route is created, each application will be able to call the endpoint of the feature flags at the time of mounting, and store the result in a context at the root of the application.
The database format allows to store the feature flags as objects and not as a simple boolean variable. Storing json object is also possible in .env file but clearly hard to to maintain. It is therefore possible to customize our feature flags as we wish by adding other information (description, tags, version, etc.) or even create several different types according to our needs.
Changing the value of a feature flag can now be done dynamically, from an admin interface for example.
I concede that this approach is more challenging to implement. That’s why I propose you, in the next part, a small tutorial to set up all this system on a Nest.js/Next.js project.
🫵 Do it yourself
🍭 The target
We have a basic application with an unfinished new feature. The goal is to add a feature flag system that allows to hide or show the new feature on the fly.
The new feature consist of a button on home page that links to the feature.

The code and the feature flag implementation are available on GitHub.
🪖 Tech strategy
1. Define the feature entity
Each feature flag should have a name that reference the feature and an activation status true or false.
Let’s create a Nest.js new module to handle all the future feature flag logic in the backend. Add a feature.entity.ts file in the new feature module that will define the type of each feature key.
src/modules/feature/feature.entity.ts:
import BaseEntity from "@helpers/BaseEntity";
import { Column, Entity } from "typeorm";

@Entity("features")
export class Feature extends BaseEntity {
  @Column({ length: 50 })
  name!: string;

  @Column()
  isActive!: boolean;
}
2. Generate and run the migration
Type ORM automatically detected the feature.entity.ts.
When running pnpm migration:generate Type ORM will detect that the feature entity is not in the database and will generate a migration to run to create it in database.
Run the new generated migration with pnpm migration:run to create the feature table in data base.
You can enter the database through the docker container to verify features table presence by running the following commands:
docker exec -it backend-db-1 sh
psql -U nestjs api
\dt
You should get the following output:
          List of relations
 Schema |    Name    | Type  | Owner
--------+------------+-------+--------
 public | features   | table | nestjs
 public | migrations | table | nestjs
 public | session    | table | nestjs
 public | users      | table | nestjs
(4 rows)
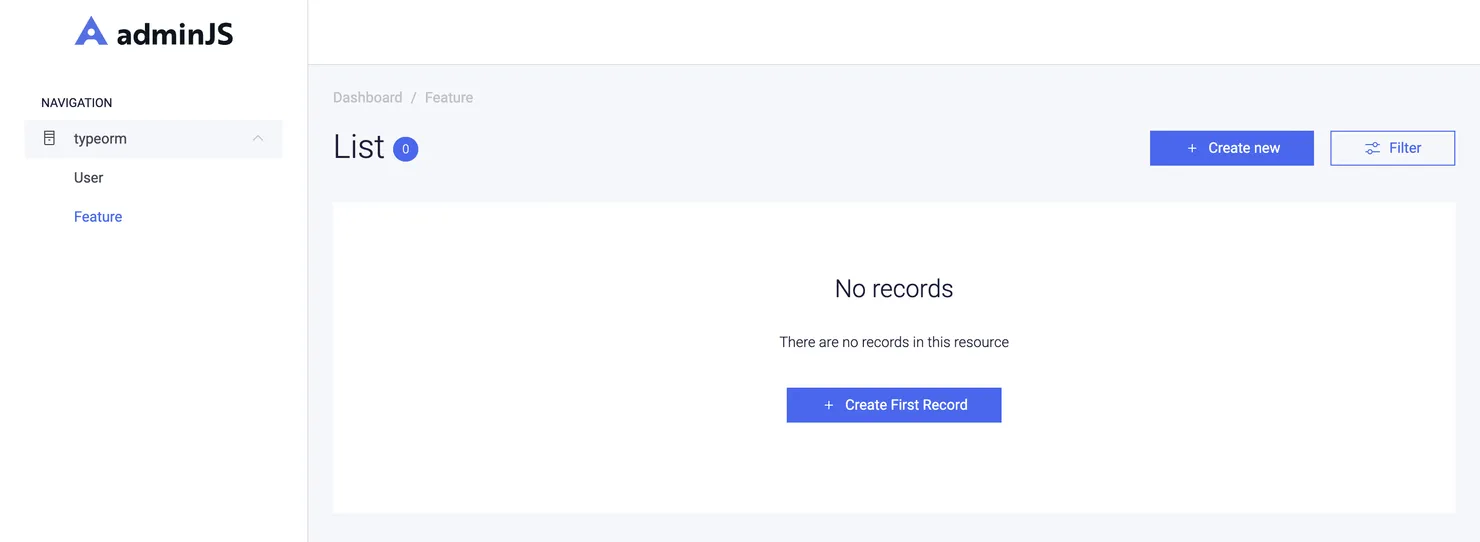
3. Show feature table in Admin.js
It’s not very convenient to do severals commands to administrate tables and data. That is why Admin.js exist, to create and modify table records on the fly.
To do so let’s define the feature module.
src/modules/feature/feature.module.ts:
import { AdminResourceModule } from "@adminjs/nestjs";
import { Module } from "@nestjs/common";
import { TypeOrmModule } from "@nestjs/typeorm";

import { Feature } from "./feature.entity";

@Module({
  imports: [
    TypeOrmModule.forFeature([Feature]),
    AdminResourceModule.forFeature([Feature]),
  ],
})
export class FeatureModule {}
Don’t forget to add it in app.module.ts imports list.
The AdminResourceModule allows us to manage our feature table directly on Admin.js on http://localhost:8000/admin.

4. Create an api endpoint to get features data
We simply need to follow the Nest.js standard and create a feature controller, a feature service and reference them in the feature module.
The feature service is fetching all data from the feature repository with await this.featureRepository.find().
src/modules/feature/feature.service.ts:
import { Injectable } from "@nestjs/common";
import { InjectRepository } from "@nestjs/typeorm";
import { Repository } from "typeorm";

import { Feature } from "./feature.entity";
import GetFeatureDto from "./interfaces/GetFeatureDto";

@Injectable()
export class FeatureService {
  constructor(
    @InjectRepository(Feature)
    private readonly featureRepository: Repository<Feature>,
  ) {}

  getAll = async (): Promise<GetFeatureDto[]> => {
    return await this.featureRepository.find();
  };
}
The feature controller defines a GET api route available under /features.
src/modules/feature/feature.controller.ts:
import { Controller } from "@decorators/controller";
import { Get } from "@decorators/httpDecorators";

import { FeatureService } from "./feature.service";
import GetFeatureDto from "./interfaces/GetFeatureDto";

@Controller("features")
export class FeatureController {
  constructor(private readonly featureService: FeatureService) {}

  @Get({ isPublic: true })
  getAll(): Promise<GetFeatureDto[]> {
    return this.featureService.getAll();
  }
}
It is mandatory to reference the feature service and controller in the feature module to make them part of the application. src/modules/feature/feature.module.ts:
@Module({
  imports: [
    TypeOrmModule.forFeature([Feature]),
    AdminResourceModule.forFeature([Feature])
  ],
  controllers: [FeatureController],
  providers: [FeatureService],
})
src/modules/feature/interfaces/GetFeatureDto.ts:
export default class GetFeatureDto {
  readonly name!: string;
  readonly isActive!: boolean;
}
5. Create a feature api client
Retrieving all feature flags in the frontend is contingent upon your specific frontend architecture. To gain insights into the implementation process, you can explore the dedicated GitHub repository, particularly if you’re working within the Next.js framework. The repository provides a practical example and guidance on how to accomplish this task effectively in the context of your project.
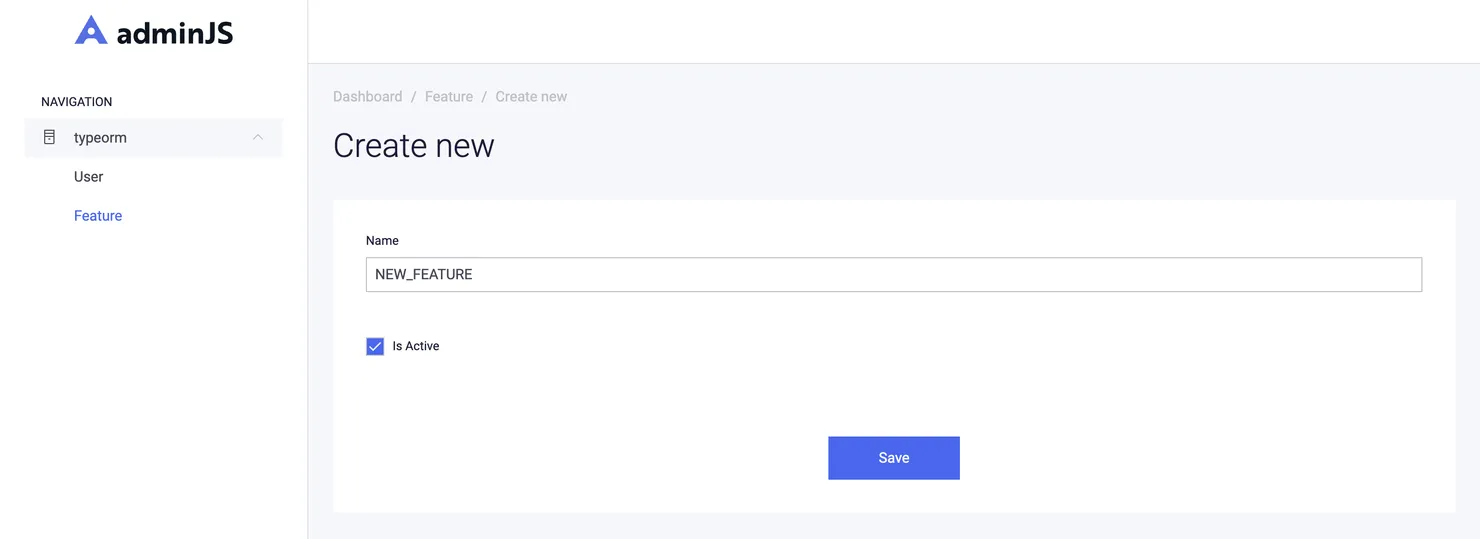
6. The feature flag
Here it comes! It’s finaly time to create the feature flag. Let’s go to Admin.js and create a new record in the feature table.

7. Code conditioning
To integrate the new feature seamlessly into our application, we must introduce conditional rendering logic into our codebase. This involves configuring the application to display or hide the feature, which in this case, includes a button leading to the feature page. As part of this process, we’ll need to implement conditional logic at two key junctures within the codebase to ensure the feature functions as intended.
First we need to hide the New feature in progress button:
export const Home = (): JSX.Element => {
  const isNewFeatureActive = useIsFeatureActive("NEW_FEATURE");

  return (
    <ContentBoxLayout>
      <div className={style.div}>
        <h1 className={style.title}>The HOME page</h1>
        {isNewFeatureActive && (
          <Link className={style.button} href={Pages.NewFeature}>
            <p className={style.p}>New Feature in progress</p>
          </Link>
        )}
      </div>
    </ContentBoxLayout>
  );
};
Please note that the value passed to useIsFeatureActive should be the same as the feature name in Admin.js.
Lastly, our task involves concealing the /new-feature page. Even though it’s inaccessible via the button because hidden by the feature page, the page remains reachable through its direct URL.
const NewFeaturePage = () => {
  const isNewFeatureActive = useIsFeatureActive("NEW_FEATURE");

  if (!isNewFeatureActive) {
    return <DefaultErrorPage statusCode={404} />;
  }

  return (
    <HeaderBarLayout>
      <NewFeature />
    </HeaderBarLayout>
  );
};
Now, with the capability to toggle the new feature directly in Admin.js, we have the flexibility to control whether the new feature is displayed or not. This functionality empowers us to develop additional features, each with its own feature flag, and effectively manage them in various environments.
🤗 Conclusion
We saw that feature flag answer to a log of feature managing issue by simply conditioning the code. An easy way can be using .env files as config files for feature flags. However this method has a lot of drawbacks. Storing them directly in DB allow flexibility at a dev cost.
There are however Saas to implement directly a feature management system. Several solutions exist like LaunchDarkly, Flagsmith or Unleash.io. Using a SaaS (Software as a Service) feature flagging solution offers the advantage of a faster and more straightforward implementation process. These services are readily available and can be quickly integrated into your project.
Nevertheless, it’s important to note that not all SaaS options are cost-free, potentially adding financial overhead to your project. Additionally, using SaaS introduces a dependency on external services, which can impact your project’s reliability. In cases where your feature flag system has unique or specific requirements, it becomes crucial to verify that the chosen SaaS aligns with your customization needs.

