File Download with Token Authentication and Javascript
Antoine Apollis6 min read

Recently on a project of mine, I was presented with a problem: I needed to allow our users to download a ZIP archive of files from our back-end, based on complex authorisation rules, following a four-step process:
- The front-end would call the back-end with a list of file names to download.
- The back-end would authenticate the user with their JWT token.
- It would then check if the user was allowed to retrieve those files.
- Finally, it would send them the archive back.
Up until now, we were relying on ‘security through obscurity’, meaning we were trusting the uniquely generated file names to prevent users from snooping around and downloading files they were not supposed to retrieve.
But this was not enough: how could we revoke the rights of the user on a file? How could we be certain that a user would not be accessing a file they were not supposed to access? We needed to add authentication to the route.
The Unauthenticated Case
First, let me show you the code we were using until now. In this case, the back-end is a Spring Boot microservice, and the front-end is an Angular SPA.
Below is a simplified version of the unauthenticated case. What this does is
define a GET route /files/download taking a set of file IDs as parameters,
and retrieving, zipping and sending the files back to the client.
@GetMapping("/files/download")
public ResponseEntity<ByteArrayResource> download(
    @RequestParam Set<UUID> fileIds
) {
    ByteArrayResource zippedFiles = new ByteArrayResource(
        fileService.getZippedFiles(fileIds)
    );

    return ResponseEntity
        .ok()
        .contentLength(zippedFiles.contentLength())
        .header(HttpHeaders.CONTENT_TYPE, "application/zip")
        .header(
            HttpHeaders.CONTENT_DISPOSITION,
            ContentDisposition
                .builder("attachment")
                .filename("archive.zip")
                .build()
                .toString()
        )
        .body(zippedFiles)
    ;
}
So now, if you make a GET request to /files/download?fileIds=UUID, you’ll
receive the file with name UUID zipped. This allows you to keep your
front-end code extremely simple because a simple anchor element pointing to
the URL to the back-end route will be enough to trigger a download pop-up in
the client’s browser, thanks to the Content-Disposition header.
So your front-end component could retrieve the required file names, concatenate them somehow, and then simply display a link to the back-end URL, like so:
<a
  href="{{ backendUrl }}/files/download?fileIds={{ fileNames$ | async }}"
>Download your archive</a>
This is all good and well, but when you do this, you cannot forward JWT tokens, so you cannot authenticate your user: you need to download the files some other way.
Adding Authentication to the Route
So first, you need to add some kind of authentication and authorization. Though my project required complex authorization rules, let us say you only want to be sure the user is logged in before sending them the files. This is only a matter of adding a decorator to your back-end route:
@GetMapping("/files/download")
@PreAuthorize("hasRole(T(fr.theodo.security.Roles).USER)")
public ResponseEntity<ByteArrayResource> download(…) {…}
This is the easy part. Now, if you were to attempt using the aforementioned link, you would get an error: as no authentication token is provided, the back-end responds with a 401 Unauthorized response. How do we fix that?
Retrieving the File with JavaScript
Downloading the file will be done in two steps: first, you will download the file using JavaScript, allowing you to set the authentication token, then, you will ‘forward’ the file to your user.
Alternatively, note that you could set up a different authentication method specifically for this route, such as a cookie-based one, though this would mean having two different authentication methods on your project, with one being used by a single route… so I would advise against it.
Downloading the File
Assuming you already perform authenticated calls to your back-end using some
kind of API client, downloading the file will be straightforward: you will
instantiate your client in your component, and call your back-end (here, it is
done with this.apiClient.downloadZipFile).
The switchMap RxJS operator allows you to discard any previous calls if
this.project$ changes; you can read more about it on Learn RxJS.
export class MainPanelComponent {
  @Input() project$!: Observable<Project>;

  constructor(private apiClient: ApiClientService) {}

  private getZip(): Observable<string> {
    return this.project$.pipe(
      switchMap(project => this.apiClient.downloadZipFile(project.files)),
    );
  }
}
‘Forwarding’ the File to Your User
Now that you have retrieved your file, returned as an Observable by
switchMap, you need to trigger the save on your user’s computer. This is only
a matter of chaining two new operators in the RxJS pipe:
…
return this.project$.pipe(
  switchMap(project => this.apiClient.downloadZipFile(project.files)),
  map(data => window.URL.createObjectURL(data)),
  tap(url => {
    window.open(url, '_blank');
    window.URL.revokeObjectURL(url);
  })
);
…
First, you map the retrieved data to an object URL (a simple string).
MDN
will explain them in greater details, but the main things you need to know are
that they are a way to create local URLs pointing to the browser memory…
and that they are not supported by Internet Explorer, so you may want to keep
that in mind depending on your target audience.
Finally, you tap into this new Observable to expose the file to your user
(simply opening a new window with this local URL will work) and clean up behind
yourself by removing the object URL (this allows the browser to free up some
memory once the file is downloaded).
Triggering the Download
You may have noticed that for now, you have a getZip method, but you do not
call it. To remedy this, you only need two new lines of code in your component
and one in its template:
export class MainPanelComponent {
  @Input() project$!: Observable<Project>;

  zipDownloadTrigger = new EventEmitter<void>();

  constructor(private apiClient: ApiClientService) {
    this.zipDownloadTrigger.pipe(exhaustMap(this.getZip)).subscribe();
  }

  …
}
<button (click)="zipDownloadEmitter.emit()">Download your archive</button>
This defines an event emitter, which emits after each click on a button. You
chain this emitter with an exhaustMap RxJS operator, which will call the
getZip method, and wait for it to complete before resuming listening to the
event emitter (hence the ‘exhaust’; again, refer to Learn RxJS
for more details).
This means that all clicks on the button are ignored while the component is
downloading the file. Note that you could do without this, in which case you
could simply pass the getZip method as a click callback on the button.
Note that for the sake of simplicity, I use a button here, but this is a bad
practice in terms of accessibility: you should always use a download link
to download a file. Here you could have a button to trigger the download,
then display the link with the local URL as its href attribute.
UX Niceties and the Final Code
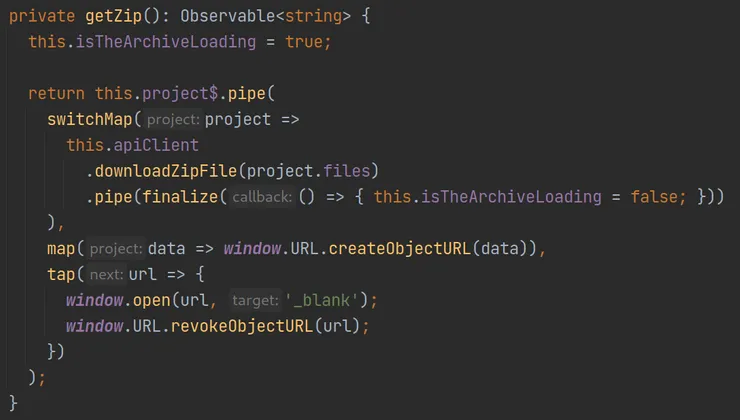
If you put all this together and add a simple loading toggle, you get the following code:
export class MainPanelComponent {
  @Input() project$!: Observable<Project>;

  isTheArchiveLoading: boolean = false;
  zipDownloadTrigger = new EventEmitter<void>();

  constructor(private apiClient: ApiClientService) {
    this.zipDownloadTrigger.pipe(exhaustMap(this.getZip)).subscribe();
  }

  private getZip(): Observable<string> {
    this.isTheArchiveLoading = true;

    return this.project$.pipe(
      switchMap(project =>
        this.apiClient
          .downloadZipFile(project.files)
          .pipe(finalize(() => { this.isTheArchiveLoading = false; }))
      ),
      map(data => window.URL.createObjectURL(data)),
      tap(url => {
        window.open(url, '_blank');
        window.URL.revokeObjectURL(url);
      })
    );
  }
}
This ensures that you can show a loader to your user if isTheArchiveLoading
is true. The finalize operator in the pipe on downloadZipFile is called
when downloadZipFile resolves, much like the Promise.finally() method.
And here you go, you have a fully functional downloading method, with an authenticated route, called from your front-end!
