How to Add Touch ID to Your React Native App
Brian Azizi9 min read

Most modern smart phones have a built-in fingerprint sensor.
On iOS, this feature is called Touch ID whereas on Android, it is generally referred to as “Fingerprint Authentication”.
People most commonly use it to unlock their device by simply pressing their finger on the fingerprint sensor.

It is a cool technology and as a React-Native developer you can actually integrate Touch ID* into your apps by using the react-native-touch-id library.
[*I will refer to this feature as “Touch ID” for the rest of the article. But everything here applies to both iOS and Android unless stated otherwise.]
There are various use cases for Touch ID and they generally fall within one of two categories:
- Increase the security of your app
- This is commonly done by adding a Touch ID lock.
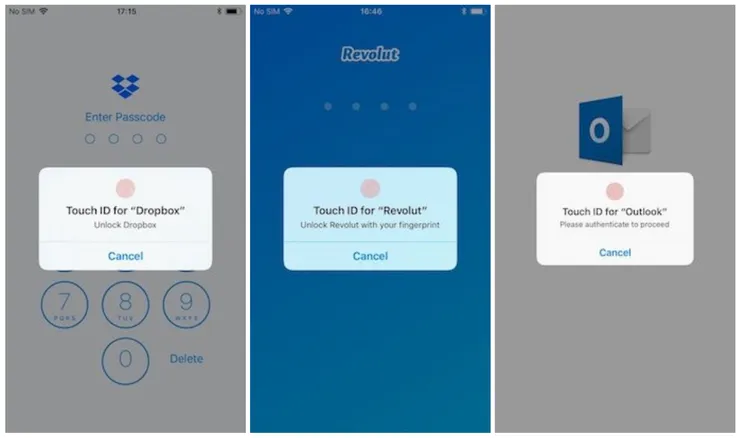
- Popular examples are Dropbox, Outlook, Revolut and LastPass
- Make your app more user-friendly
- The most common use case in this category is the Touch ID login
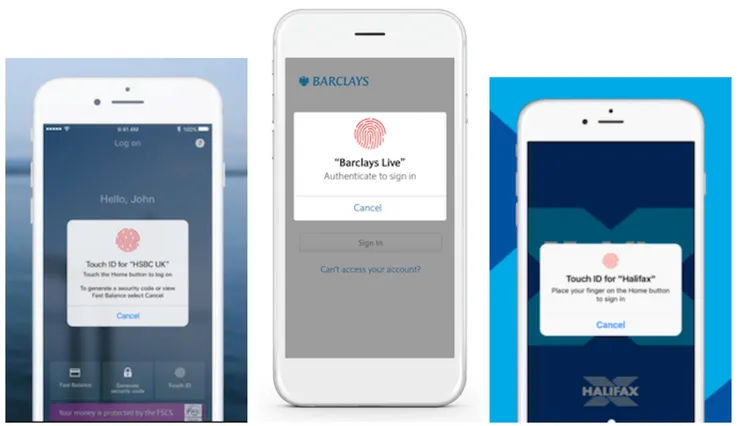
- This is very popular in banking apps such as HSBC, Barclays and Halifax
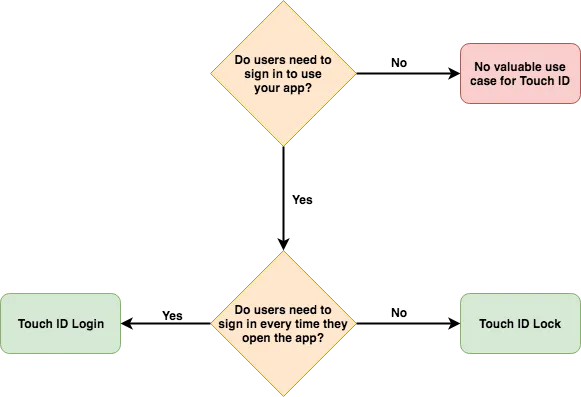
You can use the diagram below to decide how you should use Touch ID in your app:
In this article, I will explain how to add Touch ID to your React Native app and how you can implement a Touch ID Lock or Touch ID Login.
Authentication with Touch ID
There is an excellent library called react-native-touch-id that lets you easily prompt your users for Touch ID authentication.
Before you can use it, you need to install and link the library:
yarn add react-native-touch-id            # Install the JS package
react-native link react-native-touch-id   # Link the library
Once that is done, you can prompt the user to authenticate with Touch ID:
import TouchID from 'react-native-touch-id';

TouchID.authenticate('Authenticate with fingerprint') // Show the Touch ID prompt
  .then(success => {
    // Touch ID authentication was successful!
    // Handle the successs case now
  })
  .catch(error => {
    // Touch ID Authentication failed (or there was an error)!
    // Also triggered if the user cancels the Touch ID prompt
    // On iOS and some Android versions, `error.message` will tell you what went wrong
  });
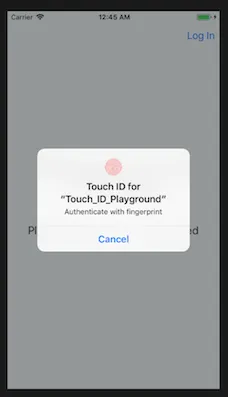
The code above will trigger the following prompt:
The TouchID library contains one more method, called isSupported.
As the name suggests, it allows you to check if the user’s device supports Touch ID.
No matter which use case you decide on, you will want to make this check before you ask your user to authenticate with Touch ID:
import TouchID from 'react-native-touch-id';

TouchID.isSupported()
  .then(biometryType => {
    if (biometryType === 'TouchID') {
      // Touch ID is supported on iOS
    } else if (biometryType === 'FaceID') {
      // Face ID is supported on iOS
    } else if (biometryType === true) {
      // Touch ID is supported on Android
    }
  })
  .catch(error => {
    // User's device does not support Touch ID (or Face ID)
    // This case is also triggered if users have not enabled Touch ID on their device
  });
Note for iPhone X: On iOS, react-native-touch-id actually supports both Touch ID and Face ID.
When you call TouchID.authenticate, the library will figure out which authentication method to use and show the correct prompt to the user.
It makes no difference in the way you use the library.
However, you should make sure to adjust the language of your app.
Don’t say “Touch ID” when you actually mean “Face ID”.
You can use the TouchID.isSupported method to get the correct biometry type for your iOS users.
When not to use Touch ID
Touch ID is a great addition for most apps.
But there cases in which it doesn’t really make sense to add Touch ID.
Generally speaking, if your app has no notion of user accounts, then you will have a hard time finding a good use for Touch ID.
Without user accounts, there is usually nothing private on the app that would benefit from protection.
Touch ID Lock: Make your app more secure
The Touch ID lock is the most popular use of Touch ID in modern apps:
Whenever the app is opened, the user is presented with a lock screen and asked to authenticate via Touch ID.
Only if authentication is successful will the user gain access to the app.
This is a great way to integrate Touch ID in your app.
Your users get a whole layer of additional security and the cost in user experience is minimal.
Adding a Touch ID lock makes the most sense if
- your users have to sign in to use the app (and there is something worth protecting)
- your users remain signed in (otherwise there is no real security gain)
Implementing the Touch ID lock
Adding the actual Touch ID authentication layer is simple.
You could create a Lock component that wraps around your app:
import React from 'react';
import TouchID from 'react-native-touch-id';
import App from './App';
import Fallback from './Fallback';

class Lock extends React.PureComponent {
  state = { locked: true };

  componentDidMount() {
    TouchID.authenticate('Unlock with your fingerprint').then(success =>
      this.setState({ locked: false }),
    );
  }

  render() {
    if (this.state.locked) {
      return <Fallback />;
    }

    return <App />;
  }
}
This component prompts the Touch ID authentication as soon as it mounts.
If authentication is successful, it renders your app (“unlocking” it).
If authentication is not successful, it renders a fallback component.
And handling the fallback is where the actual complexity of the Touch ID lock lies.
Handling the fallback
What happens if Touch ID no longer works for your user?
This could be due to something simple like wet fingers.
Or it could be that the fingerprint sensor in your users device has broken.
If you don’t handle the fallback correctly, your users will be locked out of your app.
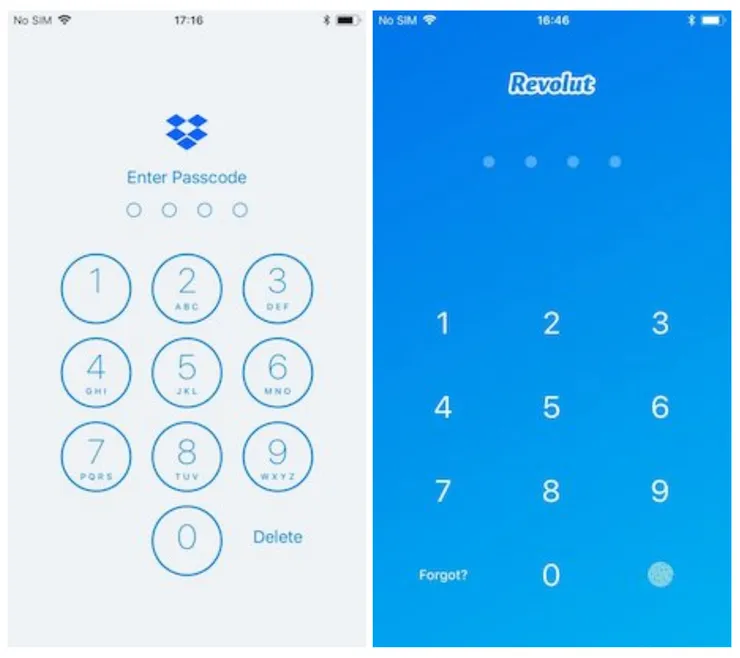
The most popular option for handling the fallback is actually inspired by the iOS lock screen itself: a passcode lock.
Passcodes are still relatively quick to unlock for your user, and they do a good job of keeping the app secure.
I haven’t been able to find a good library for adding a passcode input.
But you might prefer to implement your own UI components anyway.
Where should you store the user’s passcode?
The simplest option would be to store the passcode on the users device itself.
I would recommend against using React Native’s built-in Async Storage.
It does not encrypt your data and anyone with access to the physical device will be able to read the code in plaintext.
Instead, I recommend using react-native-keychain which allows you to store credentials in your phone’s secure storage (the “keychain” in iOS and the “keystore” on Android).
Handling the fallback of the fallback
What happens if your user forgets the passcode?
The simplest solution is the one used by Dropbox: Users are logged out if they enter a wrong passcode 10 times in a row.
Touch ID Login: Make your app more user-friendly
Another popular use of Touch ID is the Touch ID login.
Users are prompted to authenticate with their fingerprint, and if authentication is successful, they get logged into the app.
This use case makes most sense if your users do not remain signed in and have to log in every time they open the app.
Therefore, you see this often being used in banking apps.
Implementing the Touch ID Login
There are three steps to implementing the Touch ID Login:
- Store the user’s login credentials on the device
- Prompt the user to authenticate with Touch ID on the login screen
- If Touch ID authentication is successful, use the stored credentials to perform the login call behind the scenes
First time users will have to manually sign into the app.
During the initial sign in, you can store the user’s credentials in the secure storage of the device.
Again, do not use React-Native’s built-in Async Storage.
This is even more critical for the Touch ID login because it would be storing the user’s password in cleartext.
To store the user’s credentials securely, you should use react-native-keychain.
First, you need to install it:
yarn add react-native-keychain            # Install the JS package
react-native link react-native-keychain   # Link the library
You can then store the credentials in the keychain when the user logs in:
import * as Keychain from 'react-native-keychain';
import { login } from './api';

// Submission handler of the login form
handleSubmit = () => {
  const {
    username,               // Get the credentials entered by the user
    password,               // (We're assuming you are using controlled form inputs here)
    shouldEnableTouchID,    // Did you ask the user if they want to enable Touch ID login ?
  } = this.state;

  login(username, password) // call the `login` api
    .then(() => {
      if (shouldEnableTouchID) {
        // if login is successful and users want to enable Touch ID login
        Keychain.setGenericPassword(username, password); // store the credentials in the keychain
      }
    });
};
Next time the user lands on the login screen, you can present them with the Touch ID authentication prompt.
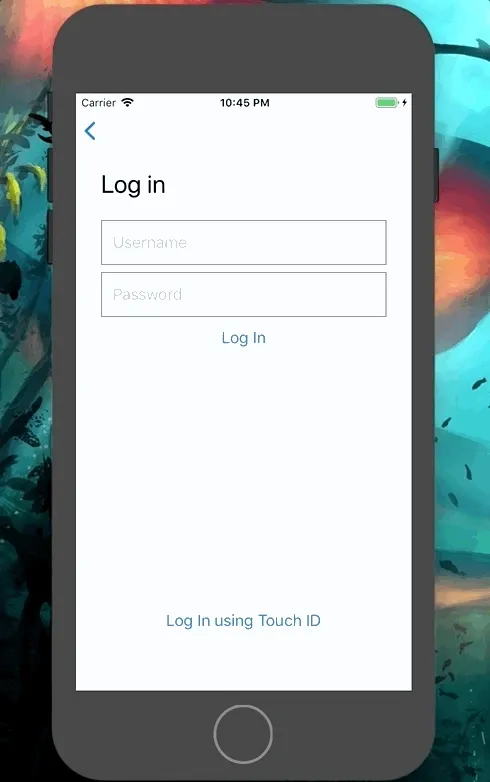
For example, you could add a button on the login form that allows users to login via Touch ID.
If the fingerprint authentication is successful, you can retrieve the credentials from the keychain and use them to make the login request.
The actual Touch ID login will look similar to this:
import * as Keychain from 'react-native-keychain';
import { login } from './api';

handlePress = () => {              // User presses the "Login using Touch ID" button

  Keychain.getGenericPassword()   // Retrieve the credentials from the keychain
    .then(credentials => {
      const { username, password } = credentials;

      // Prompt the user to authenticate with Touch ID.
      // You can display the username in the prompt
      TouchID.authenticate(`to login with username "${username}"`)
        .then(() => {

          // If Touch ID authentication is successful, call the `login` api
          login(username, password)
            .then(() => {
              // Handle login success
            })
            .catch(error => {
              if (error === 'INVALID_CREDENTIALS') {
                // The keychain contained invalid credentials :(
                // We need to clear the keychain and the user will have to sign in manually
                Keychain.resetGenericPassword();
              }
            })
        });
    });
};
Handling Invalid Credentials
Unlike the Touch ID Lock, you do not need to worry about implementing a fallback for the Touch ID Login, since you can just use the manual sign in.
However, you do need to worry about making sure that the keychain never contains invalid credentials.
Otherwise, your user might keep retrying to login via Touch ID using the wrong credentials.
In the worst case, you may end up disabling your user’s account due to too many failed login attempts.
Unfortunately, there is no guarantee that your keychain will always contain valid credentials.
Sometimes, users change or reset their credentials.
And if the username or password is changed on a different device, your keychain will end up containing invalid credentials.
If you realise that the keychain does contain invalid credentials, you must clear the keychain and turn off Touch ID.
To clear the keychain, call the Keychain.resetGenericPassword() function.
This means that your user will have to sign in manually.
However, once the manual login is successful, you can directly update the keychain with the provided credentials and the next login will quick and painless thanks to the Touch ID.
