Deploy your Symfony application on AWS Elastic Beanstalk using CloudFormation
Maxime Thoonsen4 min read
I decided to follow an advice shared on twitter via the The Practical Dev: the best way to learn AWS is to start using it.
The problem
I was looking for a way to quickly create a Minimum Viable Stack on AWS with the following properties:
- Be setup in less than 10min
- Be able to run a Symfony application
- Using PostgreSQL on RDS
- Deployment is easy and fast
- Non AWS experts can create the MVS
But I couldn’t find any out-of-the-box tools so I looked for a solution. Here I describe my journey which ended up with a ready-to-go CloudFormation configuration.
Elastic Beanstalk
I started working with Elastic Beanstalk, the PAAS of AWS, which seemed to be exactly what I needed. Thanks to this article on Elastic Beanstalk configuration files and this one on how to deploy a Symfony application, I was able to run my application after some debugging cycles. My problem after that was that I couldn’t reuse my configuration to recreate the whole environment (Elastic Beanstalk instances + RDS instance) for a new project so I chose to experiment using CloudFormation.
CloudFormation
CloudFormation is an AWS service that creates a complete stack (VPC, load balancers, web servers, ..) from a template file.If you want to learn how to use CloudFormation, I recommend you to start by learning the basic templates. I started from a sample Elastic Beanstalk template and changed it so it can run a Symfony App. Here are the steps you need to perform in order to use my template:
Step 1: Because we will pass to the Elastic Beanstalk server the information to connect to the RDS postgresql database through environment variables, you need to update your parameters.yml with the following values:
database_host: "%env(DB_HOST)%"
database_port: 5432
database_name: "%env(DB_NAME)%"
database_user: "%env(DB_USER)%"
database_password: "%env(DB_PASSWORD)%"
Step 2: Ensure you have specified the driver to “pdo_pgsql” in the “app/config/config.yml” file.
Step 3: Upload a zip file with all your code to a s3 bucket. You create the zip file with this command:
zip -r code.zip . --exclude=*vendors*`
Step 4: Download my CloudFormation template.
Step 5: Go to your AWS console and open the CloudFormation and click on “create new stack”.
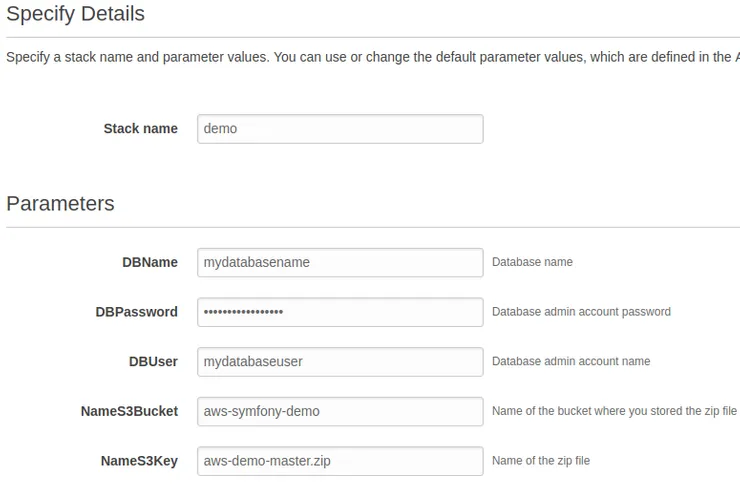
Step 6: Enter the required information:

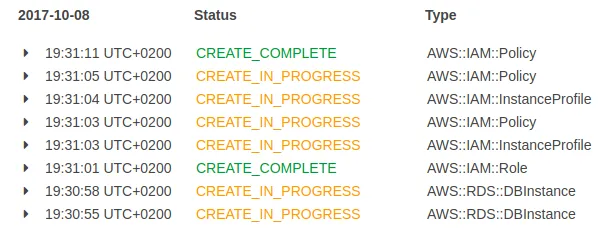
Step 7: Click on “next”, “next” and check “I acknowledge that AWS CloudFormation might create IAM resources.”. Then you can click on create. If everything is fine then you should see something like this:

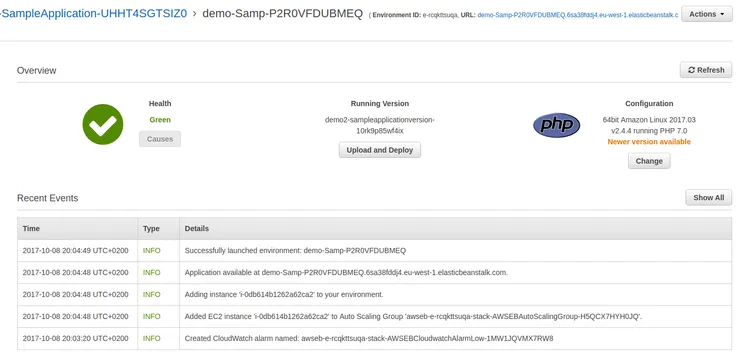
Step 8 : You can check the Elastic Beanstalk page to see if everything went okay and find the url of your project at the top of the page.

Security remark: the password of your database will be available on the AWS console in the config section. A better solution would be to use an s3 file that will be copied during the initialisation of the Elastic Beanstalk container using .ebextensions files or using KMS and DynamoDB.
Configure the Elastic Beanstalk environment
Your site is online but you will want to update it. To do that you need to follow those steps:
- Ensure you don’t have a .elasticbeanstalk directory
- Run “eb init”, choose your region and the application you just created. You can find the name in the Elastic Beanstalk page.
Now you are ready, you can deploy new version of your code simply with “eb deploy”.
Conclusion
CloudFormation is a powerful tool with some drawbacks:
- It only works with AWS
- It’s not easy to write beautiful code for the infrastructure
To help you write CloudFormation templates, you can try Troposphere. An alternative to using CloudFormation is to use Terraform. You can find an objective benchmark between the two tools here.
Bonus: tips to debug your elastic beanstalk application
Here are some tips you may need to debug you app:
- If you are using GIT, to deploy the app on your EB instance, you may need to create a branch called “codecommit-origin”
- You can get the logs of the app in the EB service on the aws console
- The code that is deployed on your EB instances is automatically stored in a S3 bucket that you can access on the AWS console
- You can ssh into the EB instance with the “eb ssh” command
- The application user is webapp and you can get a bash with the following command: “sudo -u webapp /bin/bash”. It’s useful if you want to use the Symfony command without being root.
- If you create through the aws console a RDS database the default name of the database is ebdb. You can find itin the RDS service in the aws console

