The React Native Guide I Wish I Had! - Part 2: Redux and Stateful Components
Benjamin Gowers11 min read

This article takes you through a crash course of redux implementation, as well as adding it to your Todos application.
Quick Links
→ Part 1 - focuses on setting up your environment for react native, typescript and redux, as well as creating stateless components for a Todos app.
→ Part 2 - focuses on integrating redux and adding stateful components to your Todos app. (you are here!)
Table of Contents
Redux
Actions
Reducers
Selectors
Configure and Connect The Store
Bringing It All Together
Stateful Components
AddTodo
TodosList
Wrapping Up
Resources
Redux
Note: Redux Toolkit is now the recommended way of implementing Redux logic. It wraps the core Redux logic, reducing boilerplate code and potential mistakes. This guide doesn’t use Redux Toolkit, but gives a thorough introduction to Redux concepts.
I’ll explain redux in the context of how this application has been built. If you have not followed through Part 1 of this guide, it might be easier to have a look there first!
To give an overview - redux maintains a single state that can be updated using event-like actions and reducers, and accessed using selectors.
Actions
We’ll start with the actions that can be dispatched throughout the application (disregarding the all, complete and incomplete filters for now). An action is an object that has a type member and a payload member. The type is what we want to do (e.g. ADD_TODO or DELETE_TODO). The payload can be anything we want (e.g. the todo text, todo id).
With this knowledge, lets create a file in /src/store/todos called types.ts. Here we will define all the possible action types for a todo along with the todo type itself.
export const ADD_TODO = "ADD_TODO";
export const DELETE_TODO = "DELETE_TODO";
export const TOGGLE_TODO = "TOGGLE_TODO";

export interface Todo {
  id: number;
  text: string;
  completed: boolean;
}

interface AddTodoAction {
  type: typeof ADD_TODO;
  payload: string;
}

interface DeleteTodoAction {
  type: typeof DELETE_TODO;
  payload: number;
}

interface ToggleTodoAction {
  type: typeof TOGGLE_TODO;
  payload: number;
}

export type TodoActionTypes =
  | AddTodoAction
  | DeleteTodoAction
  | ToggleTodoAction;
/src/store/todos/types.ts
A todo is defined as an object with an id, some text and a completed status.
Each todo action is defined with its respective type and payload (add todo’s payload is the todo text, delete and toggle todo’s payload is the todo id).
Finally we export a new type which is a composition of all the toto action interfaces.
Now we can move on to creating the todo actions.
import { ADD_TODO, DELETE_TODO, TOGGLE_TODO, TodoActionTypes } from "./types";

export const addTodo = (todo: string): TodoActionTypes => ({
  type: ADD_TODO,
  payload: todo,
});

export const deleteTodo = (id: number): TodoActionTypes => ({
  type: DELETE_TODO,
  payload: id,
});

export const toggleTodo = (id: number): TodoActionTypes => ({
  type: TOGGLE_TODO,
  payload: id,
});
/src/store/todos/actions.ts
Later on, we will dispatch these todo action creators in the necessary components, much like a Javascript event. Each one is simply a function that takes in the necessary information (todo text, todo id) and returns an action object (type and payload). These actions are consumed by a reducer.
Reducers
Reducers are functions that take a state and an action, perform updates on the state and return a new state. These are much like Javascript event listeners (see the connection between actions - dispatchable events - and reducers - event listeners?).
import {
  ADD_TODO,
  DELETE_TODO,
  TOGGLE_TODO,
  Todo,
  TodoActionTypes,
} from "./types";

const initialState: Todo[] = [];

let id = 0;

const todosReducer = (
  state = initialState,
  action: TodoActionTypes,
): Todo[] => {
  switch (action.type) {
    case ADD_TODO:
      return [
        {
          id: ++id,
          text: action.payload,
          completed: false,
        },
        ...state,
      ];
    case DELETE_TODO:
      return state.filter((todo) => todo.id !== action.payload);
    case TOGGLE_TODO:
      return state.map((todo) => {
        if (todo.id !== action.payload) {
          return todo;
        }
        return {
          ...todo,
          completed: !todo.completed,
        };
      });
    default:
      return state;
  }
};

export default todosReducer;
/src/store/todos/reducer.ts
A reducer can seem very daunting at first, but it’s not so difficult! Let’s work through it.
-
It’s good practice to always create an initial state. For our todos reducer, the initial state is an empty list of todos.
-
I also create an id outside of the reducer. This is to be used inside the reducer to auto increment the id of a newly created todo.
-
The reducer takes two arguments - the current
stateand theaction.Inside the body of the function, we look at the action type and perform the necessary updates. In the case of
ADD_TODO, we return the original state (list of todos) with the new todo prepended.
Selectors
Selectors, as they sound, are functions that extract refined pieces of information from the global state. They are useful to avoid writing duplicate code and integrate very nicely with react hooks!
import { RootState } from "../types";
import { Todo } from "./types";

export const selectTodos = (state: RootState): Todo[] => state.todos;

export const selectTodoIds = (state: RootState): number[] =>
  state.todos.map((todo) => todo.id);

export const selectTodoById = (
  state: RootState,
  id: number,
): Todo | undefined => state.todos.find((todo) => todo.id === id);
/src/store/todos/selectors.ts
Each selector derives information from the root state. We will define this type shortly, but as you can see, selectTodos function simply takes the todos list from the root state. selectTodoIds maps each todo to its id and returns an array of ids. selectTodoById searches the todos list and returns a todo with a specified id.
Configure and Connect the Store
Now that we have all the building blocks for maintaining todo state, we should create and connect our store to our application. First, let’s define a type for the root state. This type is the definition for our entire state. So if we added another feature, user authentication for example, we would add this as another key in our RootState type.
import { Todo } from "./todos/types";

export interface RootState {
  todos: Todo[];
}
/src/store/types.ts
Then we create our store configuration file.
import { Store, combineReducers, createStore } from "redux";

import { RootState } from "./types";
import todosReducer from "./todos/reducer";

const rootReducer = combineReducers<RootState>({
  todos: todosReducer,
});

const configureStore = (): Store => {
  return createStore(rootReducer);
};

export default configureStore;
/src/store/configureStore.ts
First we create a root reducer by combining all other reducers using redux’s combineReducers function. For now, this is only the todos reducer. We’ll give our todos reducer a key of todos (as our todos reducer state is a list of todos). Note that we specify the type of our root reducer by passing it as a generic type to combineReducers.
Finally we export a function that returns a redux store. This function makes use of redux’s createStore function, called with our root reducer.
You might ask why we don’t export the invoked createStore itself? This is because we only want to create the store when the application starts, so we export a function to be invoked when the app’s root view is rendered.
Bringing It All Together
Navigate back to the /src/App.tsx file. Now we can import our configureStore function and invoke it before we render our application.
import React, { FC } from "react";
import { StyleSheet, View } from "react-native";

import { Provider } from "react-redux";
import TodosScreen from "./screens/TodosScreen";
import colors from "./config/colors";
import configureStore from "./store/configureStore";

const store = configureStore();

const App: FC = () => {
  return (
    <Provider store={store}>
      <View style={styles.container}>
        <TodosScreen />
      </View>
    </Provider>
  );
};

const styles = StyleSheet.create({
  container: {
    backgroundColor: colors.light,
    flex: 1,
  },
});

export default App;
/src/App.ts
I appreciate that we don’t have the TodosScreen component just yet, but that can be ignored for now. Our main focus is the new Provider component. This is a component provided by redux that allows us to pass down the store behind the scenes, making it accessible by any of its children. We pass the store into the Provider through its props.
Stateful Components
There are 4 components left to make.

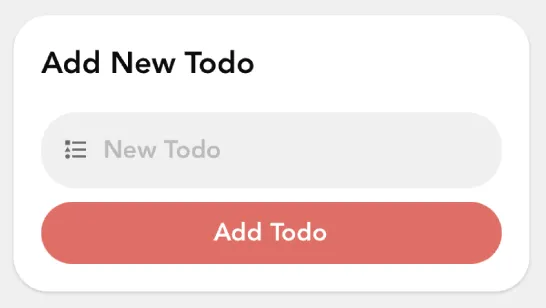
AddTodo.tsx


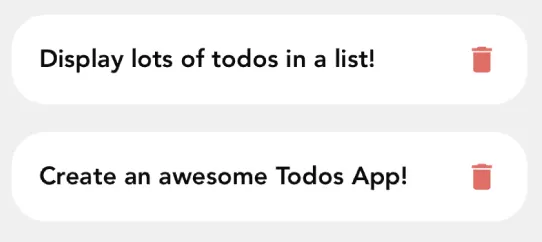
TodoItem.tsx

TodosList.tsx

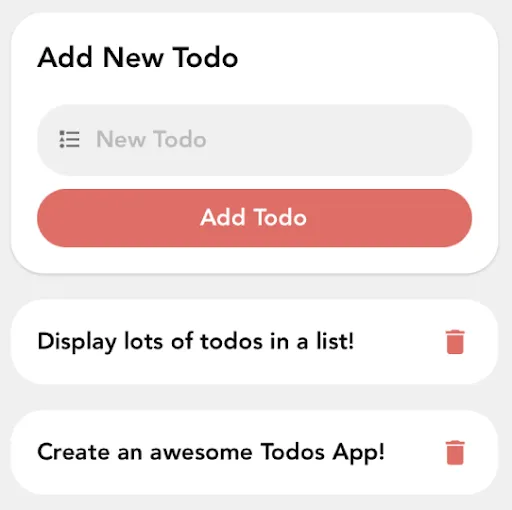
TodosScreen.tsx
We’ll work through AddTodo together, then I’ll let you do the rest! You should create them in this order:
- AddTodo
- TodoItem
- TodosList
- TodosScreen (make this component in the
/src/screensdirectory)
AddTodo
AddTodo is a standard react function component.
import React, { useState } from "react";

import AppTextInput from "./AppTextInput";
import Button from "./Button";
import Card from "./Card";
import { addTodo } from "../store/todos/actions";
import { useDispatch } from "react-redux";

const AddTodo: React.FunctionComponent = () => {
  const [todoText, setTodoText] = useState("");
  const dispatch = useDispatch();

  const handleSubmit = () => {
    if (!todoText) return;

    dispatch(addTodo(todoText));
    setTodoText("");
  };

  return (
    <Card title="Add New Todo">
      <AppTextInput
        onSubmitEditing={handleSubmit}
        icon="format-list-bulleted-type"
        placeholder="New Todo"
        onChangeText={(text) => setTodoText(text)}
        value={todoText}
      />
      <Button title="Add Todo" onPress={handleSubmit} />
    </Card>
  );
};

export default AddTodo;
/src/components/AddTodo.tsx
- We use the react
useStatehook to maintain a local state of the todo text entered in the input field. See onAppTextInput, theonChangeTextprop sets thetodoTextvalue, and thetodoTextis the value of the input itself (this is called two way binding on the todoText state variable). - Next we use the
useDispatchhook from react-redux. This hook returns a reference to thedispatchfunction from the redux store. We can use this to dispatch any action as needed. - Our
handleSubmitfunction abstracts the logic for submitting a todo. If there is no text, we do nothing, otherwise we use our dispatch reference to dispatch anaddTodoaction creator with our todo text. Finally we set the localtodoTextstate variable to an empty string in order to clear the input box. - We use the
handleSubmitfunction on press of the submit button, as well asonSubmitEditingof the text input (this handles adding a todo when return is pressed on the device keyboard).
That’s it! There aren’t many extra pieces to add in order to create a stateful react component with redux. I’ll now let you build the other 3 components. Don’t forget to use the useSelector hook with your todo selectors! The hook will return whatever your selector does.
TodosList
I should mention that the final version of my project includes todo filters, which haven’t been spoken about here. These filters largely affect this component, so here is the code minus the filter logic.
import { FlatList, StyleSheet } from "react-native";
import { shallowEqual, useSelector } from "react-redux";

import React from "react";
import TodoItem from "./TodoItem";
import { selectTodoIds } from "../store/todos/selectors";

const TodosList: React.FC = () => {
  const todoIds = useSelector(selectTodoIds, shallowEqual);

  return (
    <FlatList
      data={todoIds}
      keyExtractor={(id) => id.toString()}
      renderItem={({ item }) => <TodoItem id={item} />}
      style={styles.container}
    />
  );
};

const styles = StyleSheet.create({
  container: {
    width: "100%",
  },
});

export default TodosList;
/src/components/TodosList.tsx
There is an optimisation in this component worth talking about. You might ask why we pass a list of ids instead of a list of todos. The reason for this is so that we can use the shallowEqual function as a second argument to our useSelector hook.
The second parameter of the useSelector hook is a comparator. This comparator is used to compare items from a new state, to items from the previous state. If the item has not changed, then redux will not trigger a re-render of this item.
If we did not use this comparator, then every time we update a todo’s ‘completed’ status, the whole list of todos would re-render!
You can also look at using the [useMemo](https://reactjs.org/docs/hooks-reference.html#usememo) hook as an alternative to using a comparator.
Wrapping Up
In this guide, I haven’t included the addition of the todo status filters (all, complete, incomplete), but you should now have the tools to build this yourself.
The steps you need to take for this are:
-
Create a
/src/store/filtersdirectory. -
Create the necessary types, actions, reducer and selectors.
(Hint: you’ll need a new todos selector that selects todos based on the current filter!)
-
Create the
FilterButtoncomponent (Hint: it should dispatch aCHANGE_FILTERaction creator!). -
Add some
FilterButtoncomponents to either theTodosScreenorTodosListcomponent.
The source code on my github repository has this completely implemented if you need help or inspiration
⭐️ Thanks for reading! ⭐️
There are many, many more pieces to learn about React Native, Redux and application architecture, like: testing, routing, native features, making api calls, asynchronous state updates (Redux Saga/Thunk).
Resources
- React Tutorial - useful for learning React!
- React Hooks - if you don’t know what react hooks are or how to use them, the official docs are great!
- React Native Basics - useful for learning React Native!
- Redux Essentials, Redux - Getting Started and Redux with React - all on the redux official docs, great source of information for redux newbies!
- Typescript in 5 mins! - learn the basics of Typescript!

