Need to encrypt your existing AWS RDS database? Follow the guide!
Vincent Larrat6 min read

Let’s begin by a little game: let me guess how you reached this article, OK?
You were working on a small project and wanted to deploy it on AWS, maybe it was your first cloud try. You configured basic database instance on RDS, and as there were a lot of ununderstandable options, you kept default configuration (really, who cares about configuring tools when only working on a POC?).
Then your project got bigger and you began to store more sensitive data. As you are quite aware of security issues, you wanted to check on the AWS console that your database was well encrypted.
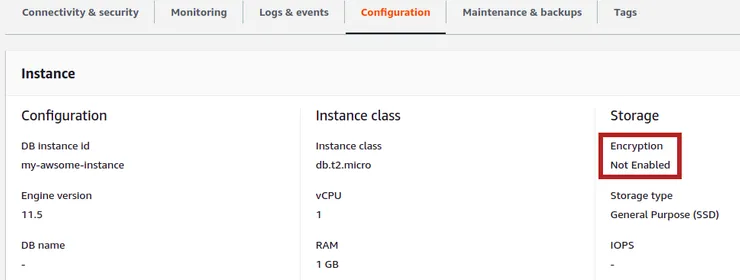
But, hell! Your database was completely unencrypted! Moreover, you realized there was no option to encrypt your existing database on the fly…
Did I guess well :)?
No? Argh…
Well, if you’re still reading, I must be close to the truth!
The problem here is that database encryption is not ticked on default RDS configuration. Moreover, depending on which instance size you chose during database instantiation, encryption was maybe simply not available at all!
Don’t panic! In this walk-through guide, I will list all prerequisites needed for encryption on an RDS instance and cover all steps to follow to encrypt your database without losing any data.
Warning: as we will have to create a fresh new RDS instance to encrypt it, there will be an unavoidable downtime, whose duration will depend on your database size.
NB: We could tackle this trade-off by using a more complex technique (by using replica databases, and switching between main and backup databases during backup/restore operations covered in this tutorial). If you would like to see such a more advanced tutorial in the future, feel free to ask for it in comments ;).
Ready! Set! Go!

Prerequisites
-
First of all, your RDS instance must support encryption (Captain Obvious inside!). Almost all RDS instance classes support it, but you should double-check that your instance class is not one of the not compatible ones listed by AWS. If you are in that case, you must previously migrate your instance to another instance class that supports encryption (this migration can be done “in-place”, but you should expect a downtime during migration).
-
You must also previously create an encryption key on the AWS KMS tool. It will be used by AWS to encrypt your RDS instance, so you should create a specific key for this use case. Be sure to create this key in the same zone as your database one, otherwise, it won’t be available when configuring encryption.
OK, now you are ready to deep dive into database encryption!
We will start by backing up your existing database, then we will create a new RDS database and restore our backup file to it. Let’s start!
Prepare your existing database for encryption
Here, we are going to back up our existing database and encrypt this snapshot during backup, using our previously generated KMS key. To reach this goal, follow these steps:
- Log on the AWS console.
- Reach RDS instances management interface (ensure to be in the right AWS zone) then select the database you want to encrypt.
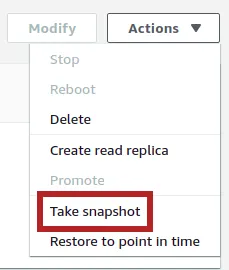
- Once on your instance configuration interface, on the top right, click on Actions menu, then select Take snapshot:
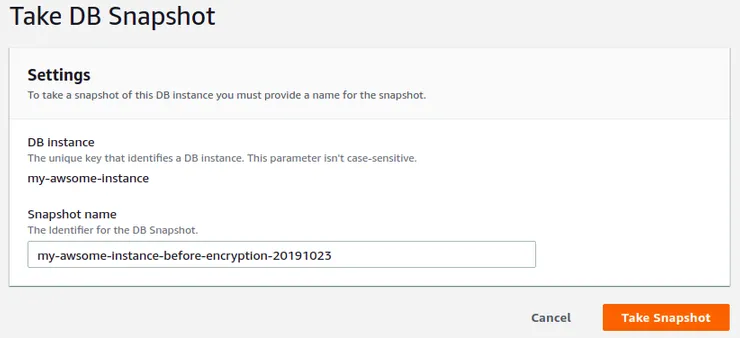
- Give a name for this snapshot, then click on the Take Snapshot button:
- Wait for the completion of snapshot creation (duration will depend on your database size).
- Once completed, select the snapshot you just created to display its details:

- On the top right, click on Actions menu, then select Copy Snapshot:
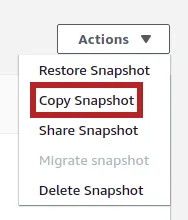
- Give another snapshot name for this copy, select Enable encryption, then select the KMS key you previously created in Master key dropdown list, and click on Copy Snapshot:
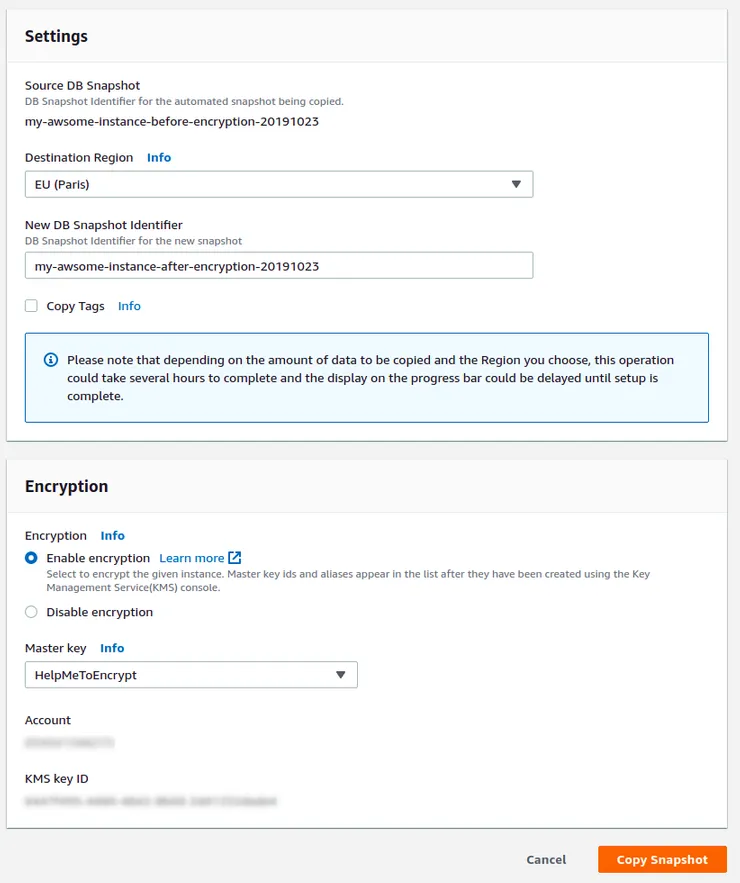
This step is crucial for encryption: it will indicate AWS to create an encrypted database when restoring from this snapshot.
- Head to snapshots list.
- Wait for the completion of snapshot duplication (duration will depend on your database size: expect same duration as snapshot creation one).
Back up step is now cleared. We can then work on the restoration step and…
Create your new encrypted database
Here, we are going to create a fresh new encrypted database with data from our previous database by simply restoring our snapshot. As usual, simply follow these steps:
- Go back to the RDS instances management interface then select your current database.
- Once on your instance configuration interface, on the top right, click on Modify icon.
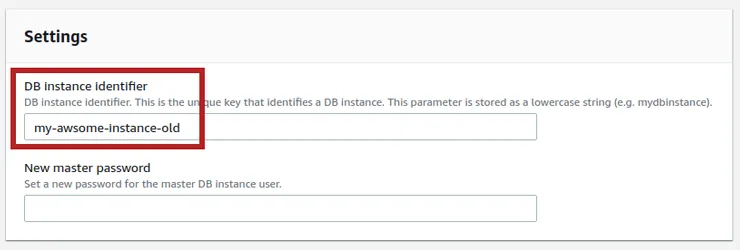
- In the Settings section, edit instance name by modifying DB instance identifier input then click on Continue:
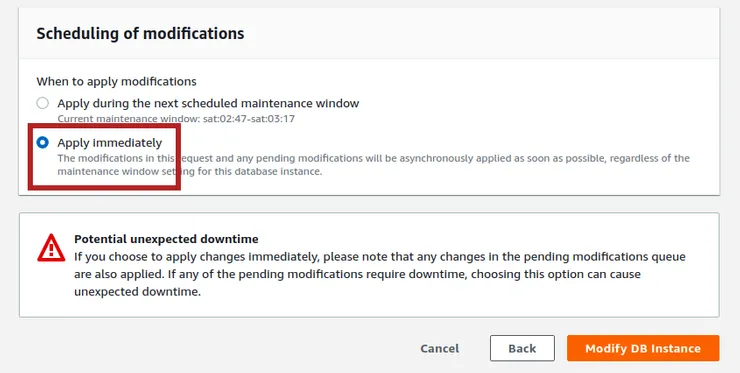
- On the confirmation page, select Apply immediately then click on Modify DB Instance:
- Wait for this modification to be complete.
- From now on, your database is no more reachable with its previous ARN and its the start of your downtime.
- Head to snapshots list.
- Select the encrypted snapshot you just created to display its details:

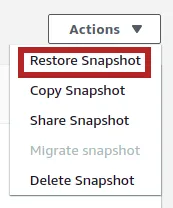
- On the top right, click on Actions menu, then select Restore Snapshot:
- On the restoration page, fill all fields with the same values as your previous database (especially, DB Instance Identifier field must contain the name of your previous database before renaming it), then click on Restore DB Instance:

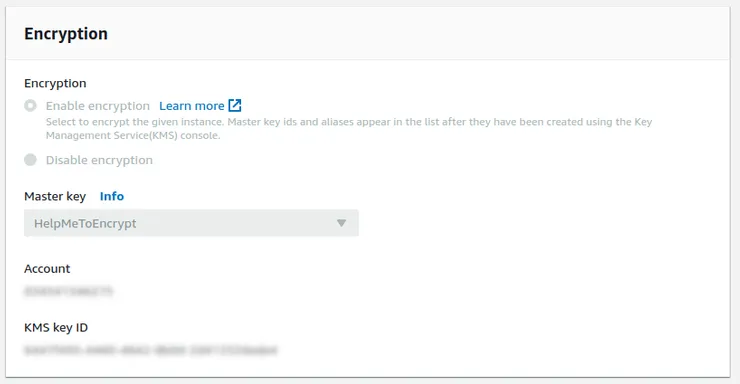
- If you have been curious, you should have seen on the restoration page that the Encryption section was enabling encryption and was using your KMS key. All this information is directly related to settings contained in the snapshot you used for restoration:
- Wait for the completion of snapshot restoration (duration will depend on your database size: expect 3x to 5x snapshot creation duration).
- If your database was part of a specific VPC/Security group, double-check that your new instance is also configured the same way and modify it if needed.
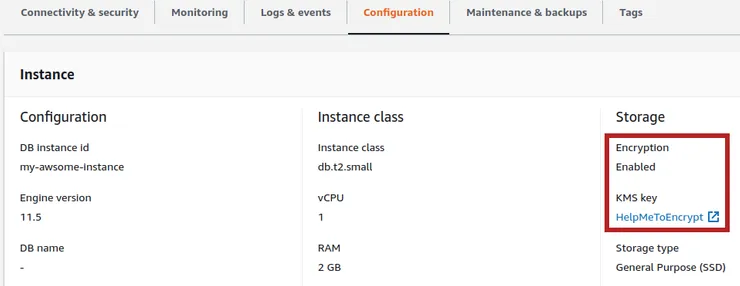
- Once finished you can check on the Configuration tab on your instance details page that your database is now encrypted:
- If you want, you can now delete your former RDS instance to save some money.
And voila!
Your new RDS database is now totally encrypted, contains the same data as your former one and is reachable through the same ARN.
Well done!


