Configure Xdebug and PhpStorm for a Vagrant project in 5 minutes
Yann Jacquot4 min read

Warning: this article concerns php5 version. If your PHP version is different, replace php5 by php/X.Y in paths (X.Y is your PHP version) and phpX.Y in command. For example :
sudo apt-get install php5-xdebugbecomessudo apt-get install php5.6-xdebug/etc/php5/mods-available/xdebug.inibecomes/etc/php/5.6/mods-available/xdebug.ini
I love debuggers. They allow me to understand deep down in my code why something doesn’t work, and are even more useful when I work on legacy projects.
When I work on the client side, the browser already provides me all the tools I need to dig deeper than some console.log() scattered semi-randomly in the source code.
However, I struggled to configure my workspace when I worked on a PHP Symfony2 project hosted in a Vagrant virtual machine.
Step1: Install Xdebug on your Vagrant virtual machine
That may seem obvious, but you need to have Xdebug installed on your virtual machine to benefit from its services.
sudo apt-get install php5-xdebug
Then, configure it:
sudo vim /etc/php5/mods-available/xdebug.ini
with the following lines:
xdebug.remote_enable=true
xdebug.remote_connect_back=true
xdebug.idekey=MY_AWESOME_KEY
Finally, if you use php5-fpm, you need to restart it:
sudo service php5-fpm restart
# or with
sudo /etc/init.d/php5-fpm restart
If you use Ansible to provision your virtual machine, you can also use a ready-to-action Xdebug role.
Step2: Configure PhpStorm
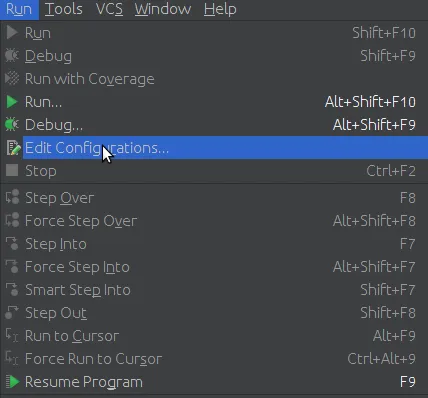
First, select the “Edit configurations” item in the “Run” menu.
Then, add a new “PHP Remote Debug” configuration.
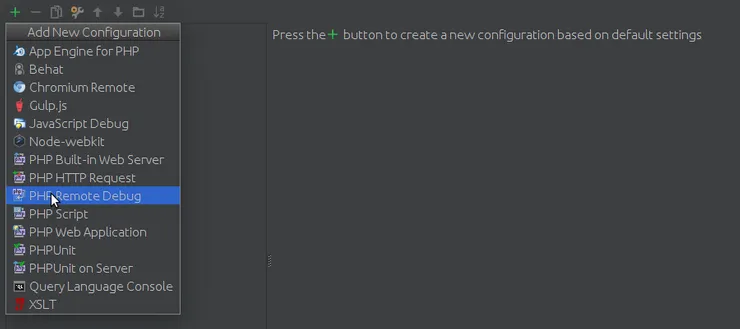
We will use the IDE key configured in your Vagrant and in your browser.
To fully configure this debugger configuration, you will need to create what PhpStorm calls a server.
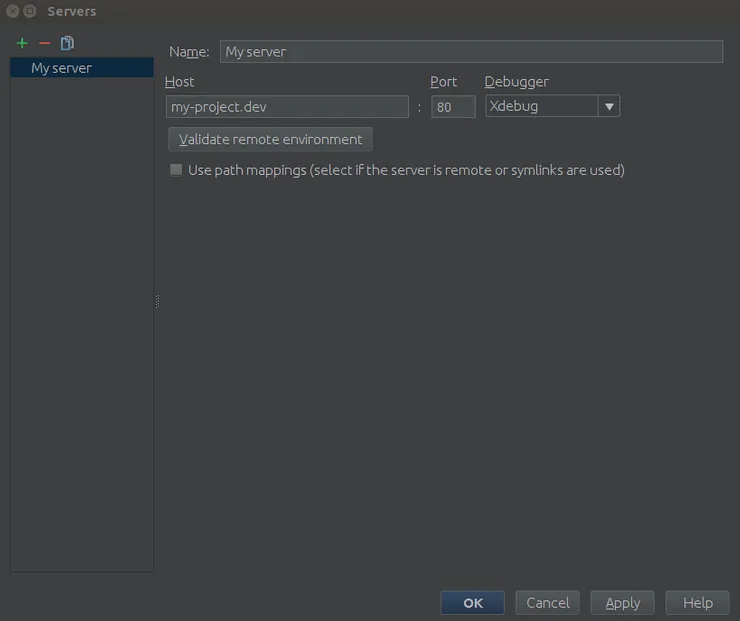
- Fill the correct hostname
- Check “Use path mappings” checkbox, and write the project’s absolute path
on your Vagrant virtual machine

Step3: Configure Xdebug
Use Xdebug to debug your web application on Chrome
Now that Vagrant with Xdebug is up and running, let’s configure Xdebug Chrome extension.
First, we need to install it from Chrome Web Store
Make sure that the extension is enabled on your browser’s extensions list page.

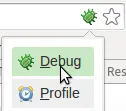
Now, you should see on the right side of the address bar the extension’s symbol.

Right-click on it, then click on the “Options” sub-menu.
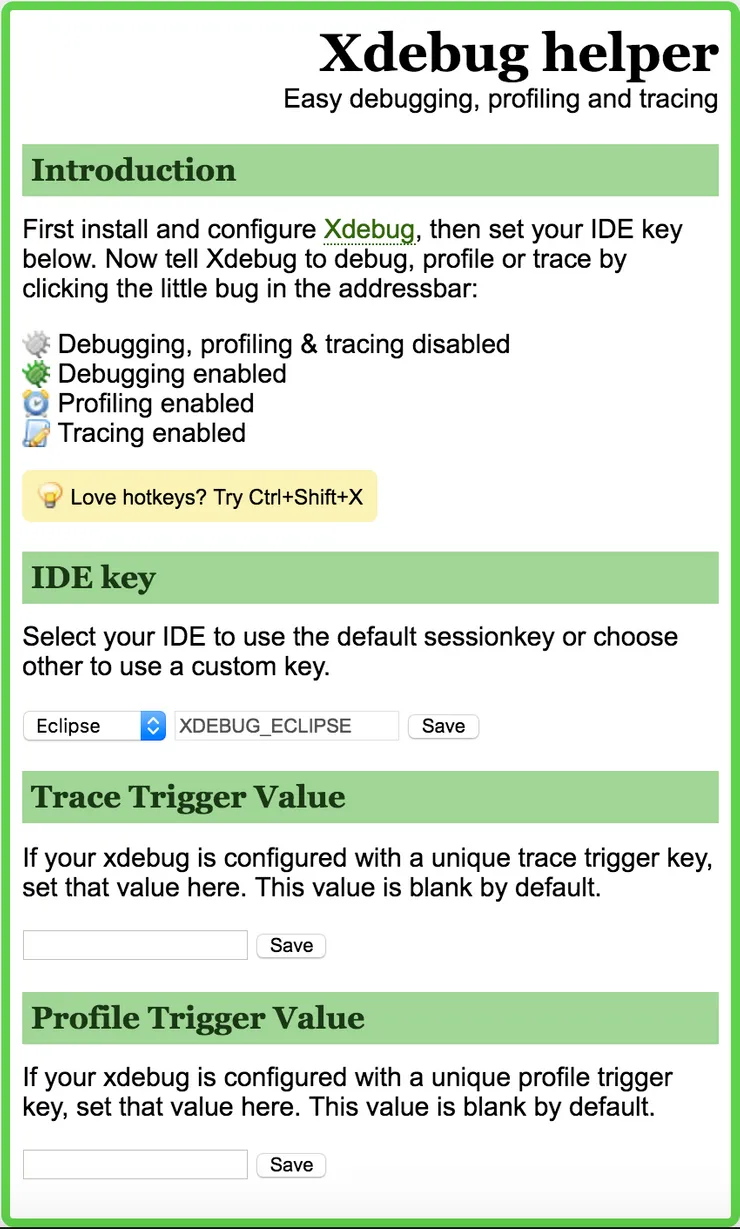
You have to use the IDE key previously set.

Xdebug plugin also exists for other browsers.
Finally, in your browser click on the bug in your address bar to switch to the “Debug” mode
Use Xdebug to debug your APIs route with Postman
Once your Xdebug configuration is added, you need to add ?XDEBUG_SESSION_START=_<XDEBUG_KEYNAME>_ at the end of your route. And that’s all!

Use Xdebug to debug commands or unit tests
To use Xdebug for debugging commands or unit tests, first, you need to add xdebug.remote_autostart=true in XDebug configuration file of your Vagrant xdebug.ini.
Then, you need to specify the xdebug.remote_host (IP address of your local from your Vagrant) when launching the command from the virtual machine’s terminal.
- First, get the host IP address by using
ifconfigfrom your local terminal (the host) :
![]()
- Then, launch your command
php -d xdebug.remote_host=10.0.0.1 your_command
For instance, if you want to debug your unit tests in a Symfony project, you can run:
php -d xdebug.remote_host=10.0.0.1 ./bin/phpunit -c app/
Step4: Enjoy!
Now, in PhpStorm you:
- Add your breakpoints by clicking to the left of the lines
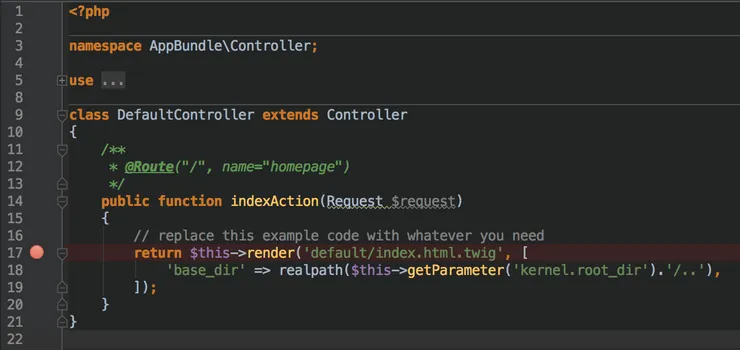
- Click on the bug icon on the upper-right corner
![]()
You should now be able to break on the exact line you selected in your IDE.
Bonus: Performance
You need to know that enabling Xdebug slows down your app (x2), the fastest way to disable it is to run the following command: php5dismod xdebug
Use php5enmod xdebug to enable it back. Each time you’ll also need to restart php-fpm or apache.
Troubleshooting: I did the tutorial but Xdebug doesn’t work
It’s probably because a symbolic link is missing in your php conf.
- First type in your virtual machine
php -i | grep xdebug
If you have no response, it means Xdebug is not set correctly
- Then check if Xdebug is mentioned when running
php -vfrom your Vagrant. - If not, add a symbolic link to specify that the Xdebug module should be enabled, for instance (you may need sudo):
ln -s /etc/php5/mods-available/xdebug.ini /etc/php5/fpm/conf.d/20-xdebug.ini
ln -s /etc/php5/mods-available/xdebug.ini /etc/php5/cli/conf.d/20-xdebug.ini
- You should obtain by running
php -v

I hope you’ve made your way through the process and that it will improve your efficiency as much as it does for me. If you have other ways to configure your debugger, feel free to share them in the comments section below.

